
#7 - Flow Creation: Behind the Scenes

Today, I share a raw, unedited screen recording where I create a flow for a fictitious business requirement.
It is not perfect, you will see where I fumble and how I work my way through the hurdles.
In the end, I hope you will find some elements of my thought process helpful.
Let’s go!
The Use Case
Employee onboarding!
We have all gone through this at some point in our lives.
Oftentimes, I felt that the onboarding could be made easier with the person knowing exactly what will happen on the first day and in the first week.
Step 1 - Visualise the process
Before jumping in to to build a Flow, it is always great to sketch the process out from end-to-end.
For this example, I’m using Miro, my FAVOURITE DIGITAL COLLABORATION TOOL on the planet.
(Note: this newsletter is not sponsored by Miro, although I wish it was).
This is how the process looks like:
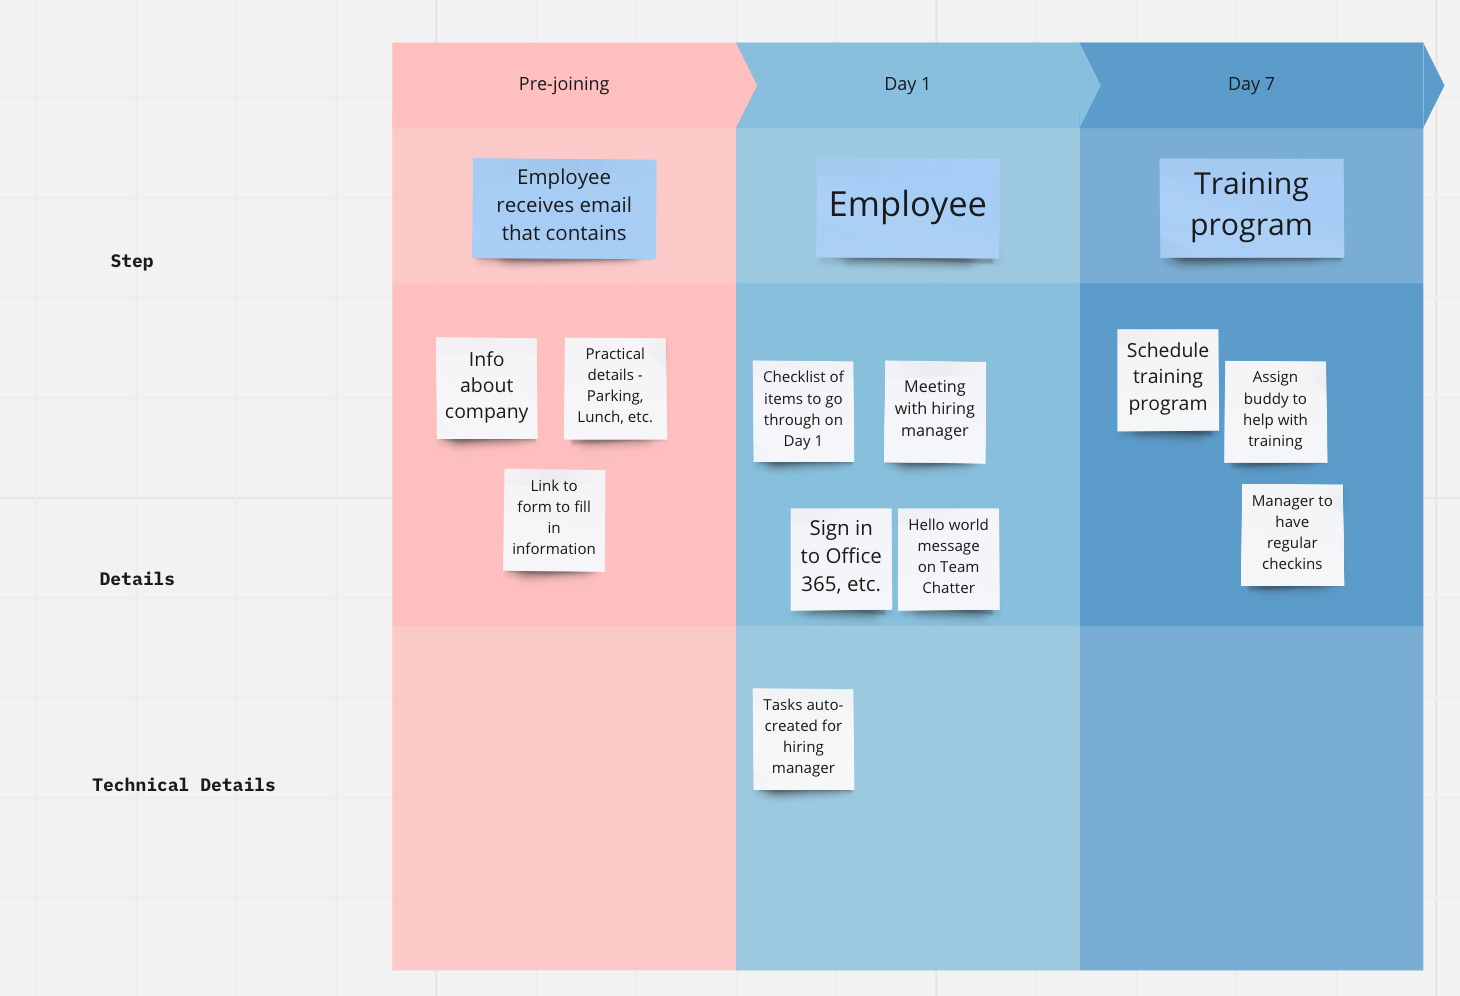
The fictitious company is called ‘Supernova’. The fictitious employee who is being onboarded is yours truly, ‘Kanav Khurana’.
The on-boarding process consists of 3 stages:
Pre-joining
The employee receives an email containing information about the company, some practical details like Parking, Lunch timings, etc.
This email also has a link to an online form to accept information like:
Bank Account number
Date of birth
Dietary preference for the lunch on Day 1 which is sponsored by the company
Day 1
On Day 1, the employee goes through a checklist of items that consists of :
Logging in to Office 365
Introducing themselves on the ‘All Colleagues’ Chatter group
Meeting with the Hiring Manager
Day 7
The Hiring manager helps the employee schedule the training program and assigns a buddy to help with any questions that may arise during the training.
The manager also schedules regular check-ins.
In this newsletter, I focus on building the ‘Pre-joining’ stage.
Let’s get those hands dirty!
Step 2 - Configure the Data Model
For the requirements, we need an Employee object with the following fields:
User (Lookup)
Name
Pre-boarding email sent (Checkbox)
Recruitment Status (Picklist)
Start Date
Hiring Manager (Lookup)
Buddy (Lookup)
Title
Step 3 - Let’s get Flowing!
The raw, unedited screen recordings can be found below. I recommend to watch these at a speed of 1.25x.
If you want to save time, I have mapped the recording as a flowchart here.
The result: Meta-observations
After re-watching myself build the flow, I realised that my approach to building can be summarised as follows:
Finish the job first
Optimise it later if mandated by the business requirements
Write down what needs to be optimised - i.e - the technical debt
Google-ing is a skill
It can be learned
Always treat Salesforce official articles as the source of truth
Treat all other sources with a pinch of salt
Subject to testing
Run thought experiments
Imagine that you are the bits that are processing the flow that you just created
Can you play out the flow in your head?
Are you missing something?
Break down a larger problem into smaller parts
Test those parts individually
Then bring it together
Iterate, iterate, iterate
Note: This flow is NOT production ready. I would probably do the following things before moving this to Production:
Perform a Validation check on Bank Account Number
Using Regex or other means
Use proper naming conventions for Flows and elements inside
Log the Pre-boarding email that was automatically sent as an Activity for traceability
Introduce a formula field to store the base URL
Instead of hardcoding it in the flow
I hope this was a fun read! I definitely had fun going through this ‘meta’ exercise.
And now, a question to you…
What do you struggle with when designing or creating flows? Are there any specific elements that puzzle you - e.g - Loops, Collections, etc?
Make some noise in the comments section! 👇
If you found this useful, please subscribe to this newsletter!
And as always, if you think someone else will find this useful, please share this with them as well.
Until next time!